
Why Use a Project Plan in Microsoft Teams?
Microsoft Teams has long outgrown its role as a chat tool. For many project teams, it is the central hub for daily collaboration – and that is exactly why it makes sense to manage your project plan where your team already works.
Key benefits at a glance:
- No switching between multiple applications
- Every team member sees the same, always up-to-date plan
- One consistent plan across Microsoft Teams, PowerPoint and Excel, always in sync
- Professional appearance in meetings and presentations
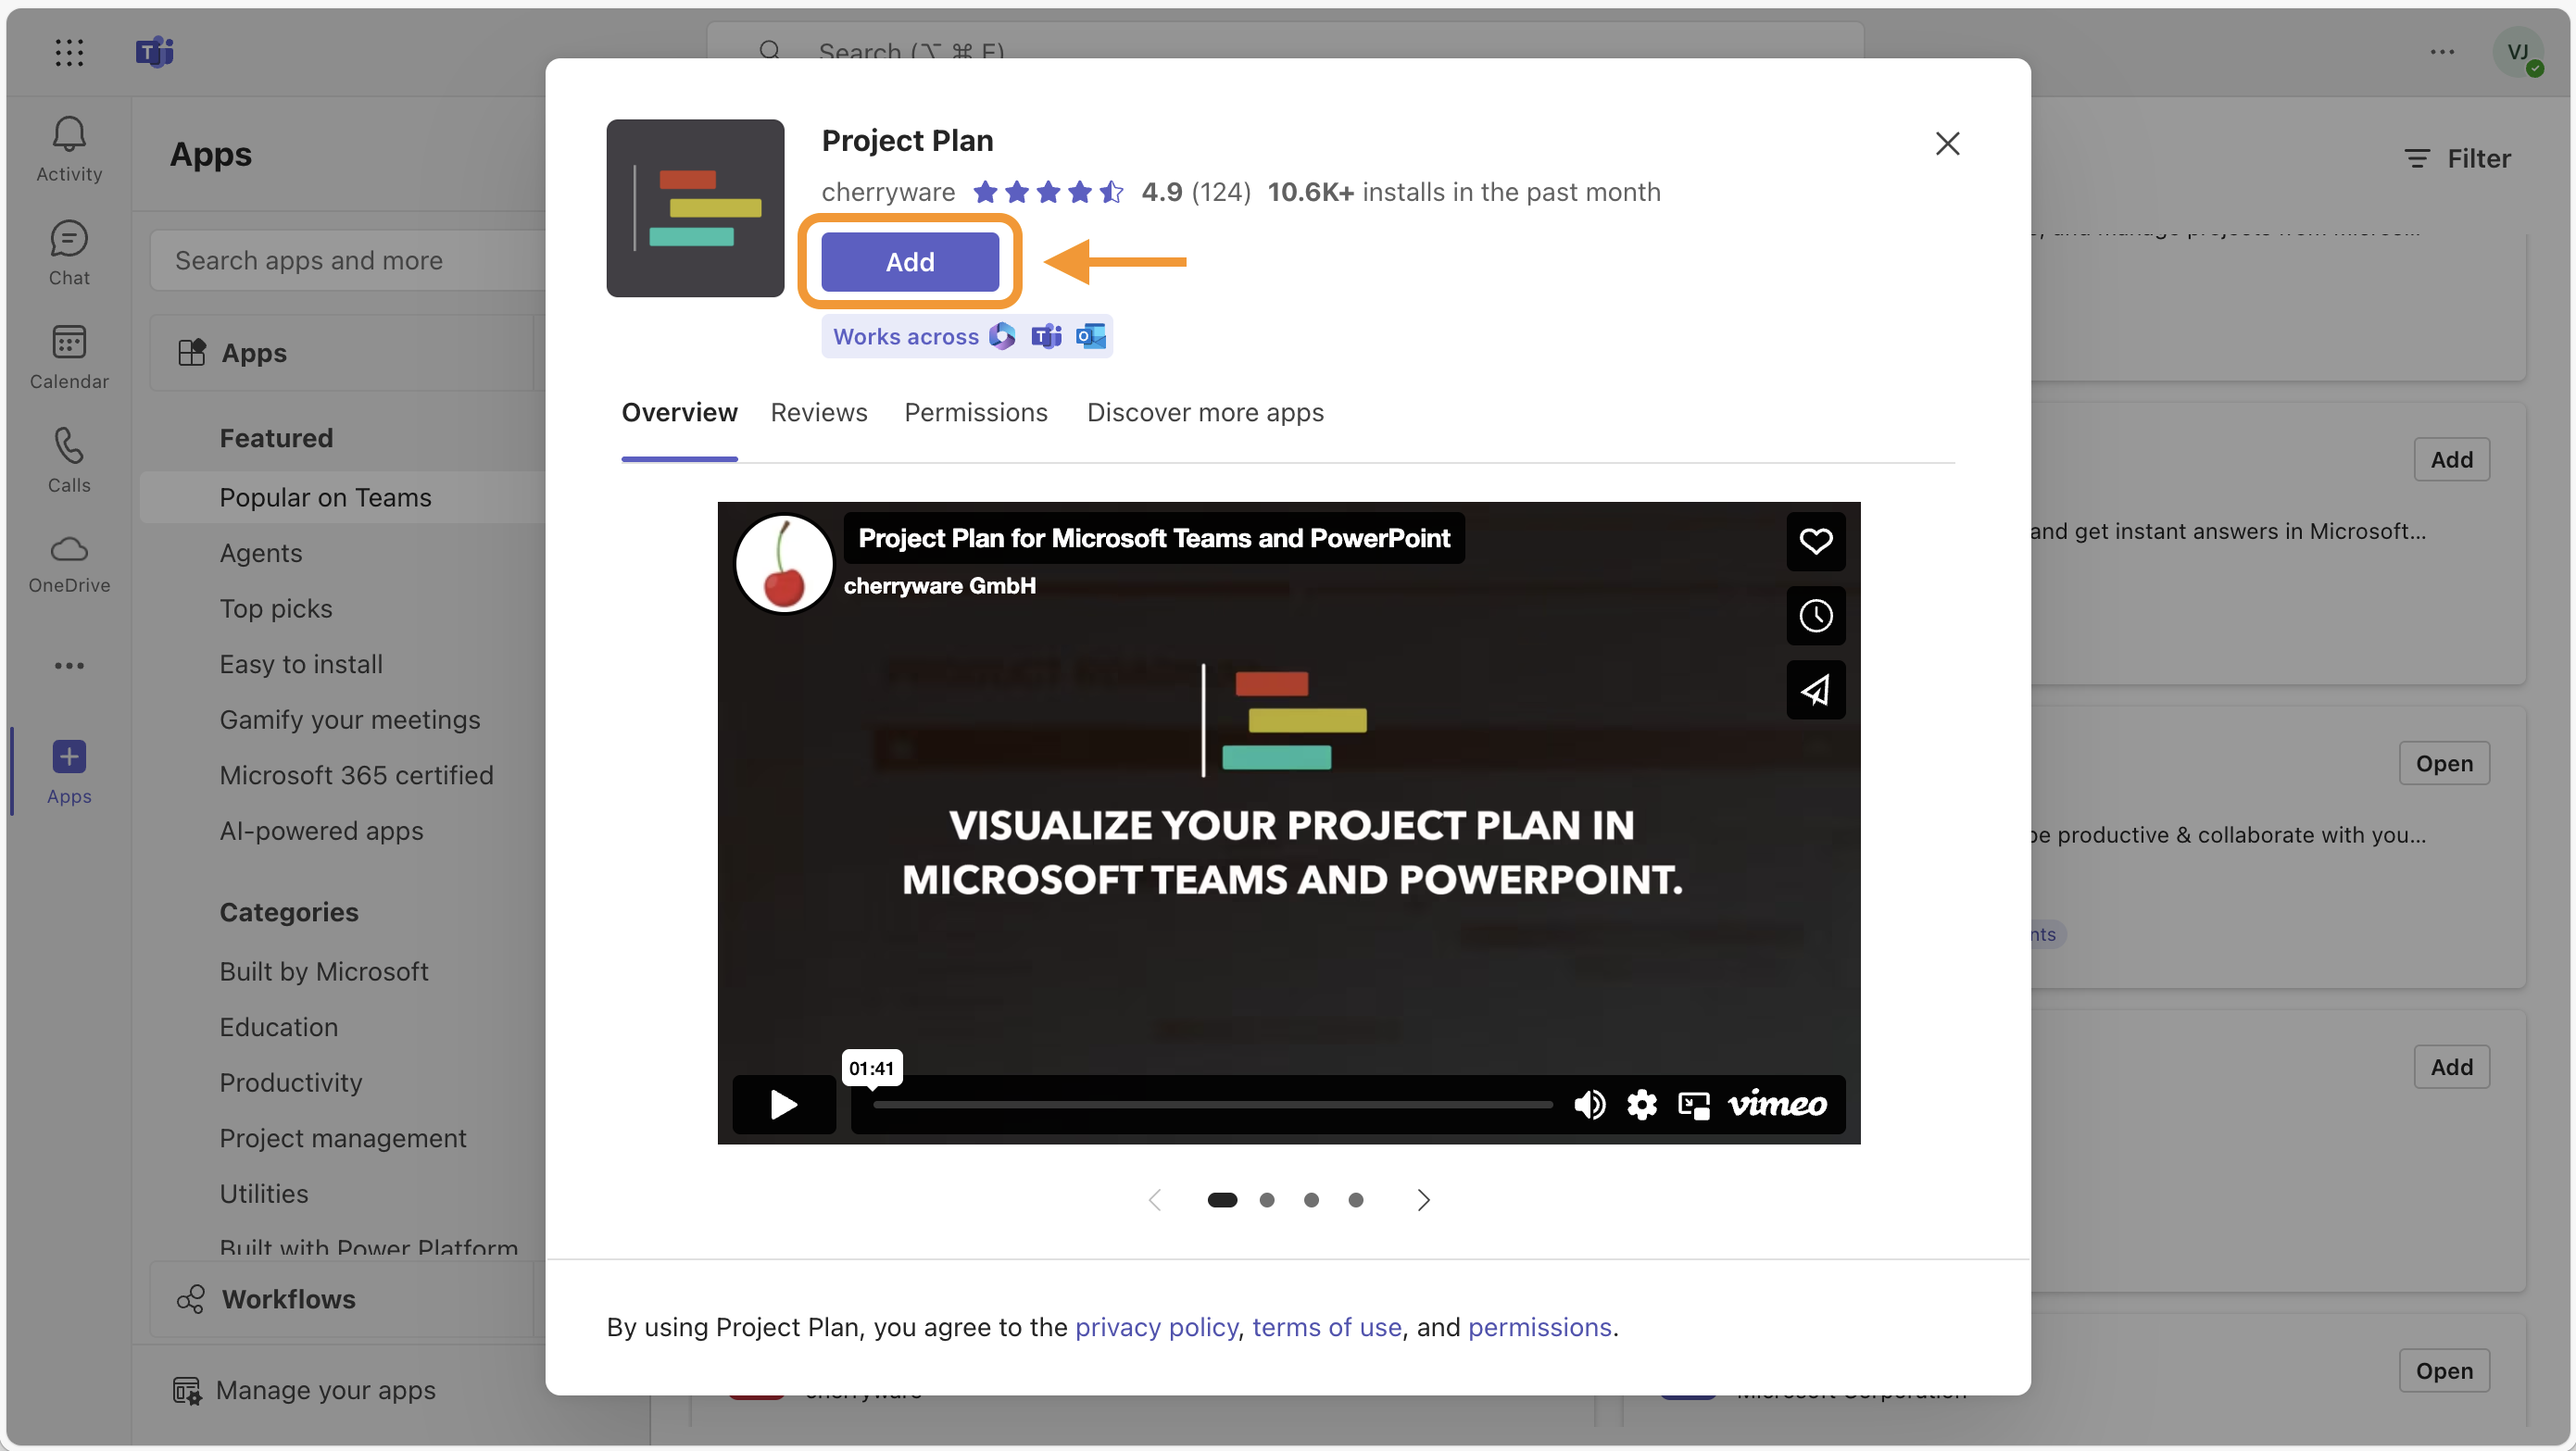
1) Install the Project Plan App
Installing Project Plan in Microsoft Teams takes less than a minute and requires no separate account.
-
Click the button below to add Project Plan directly to Microsoft Teams:
 Add in Microsoft Teams
-
In the dialog that appears, click Add.
-
Select a channel or chat where you want to use Project Plan, then click Go.

-
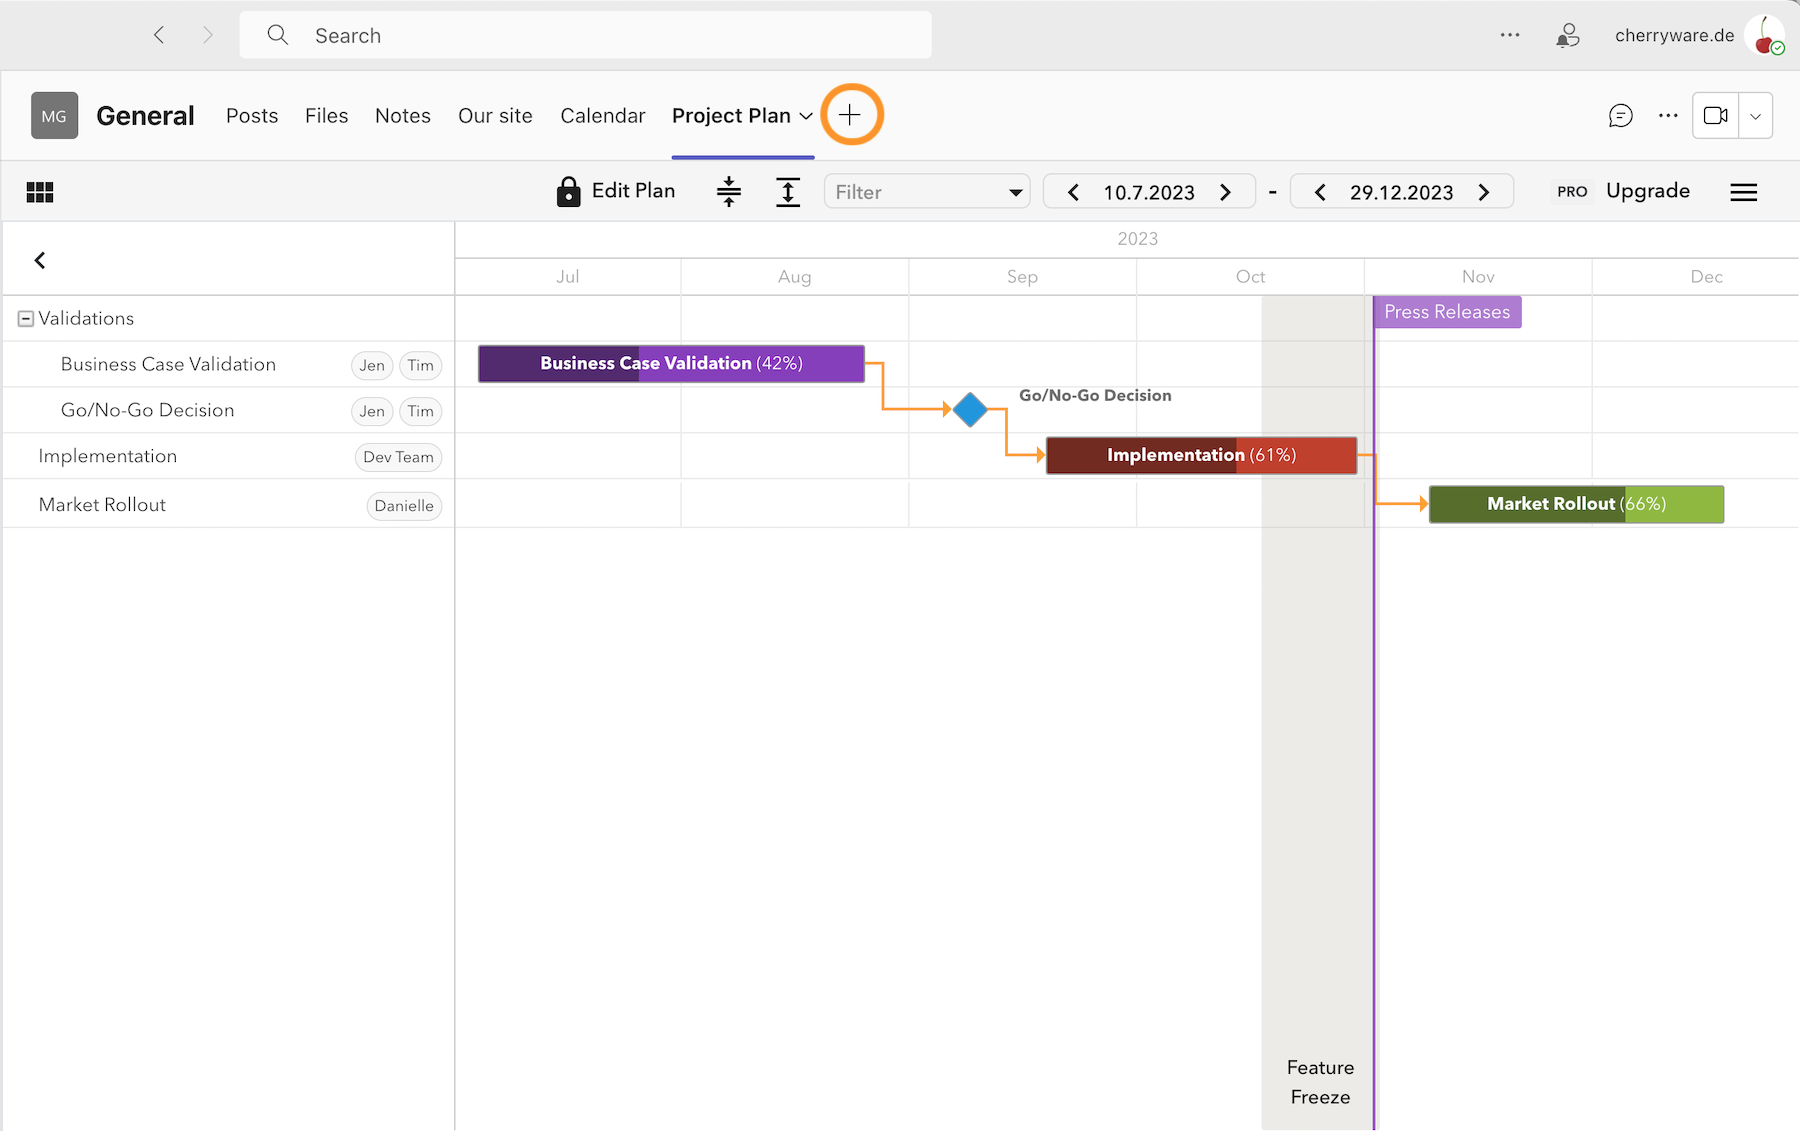
Want to add Project Plan to another channel? Simply click the plus icon in the channel tab bar to add the app again – each channel gets its own independent project plan.
2) Create Your First Project Plan
When creating a new project plan you have three options:
- Create a new project plan – a blank plan to start from scratch.
- Mirror an existing project plan – if a plan already exists in another channel or in PowerPoint/Excel, it can be referenced here and will stay in sync automatically.
- Create from a saved template – if you have already created a template, you can base the new plan on it.
For first-time use, we recommend the first option.
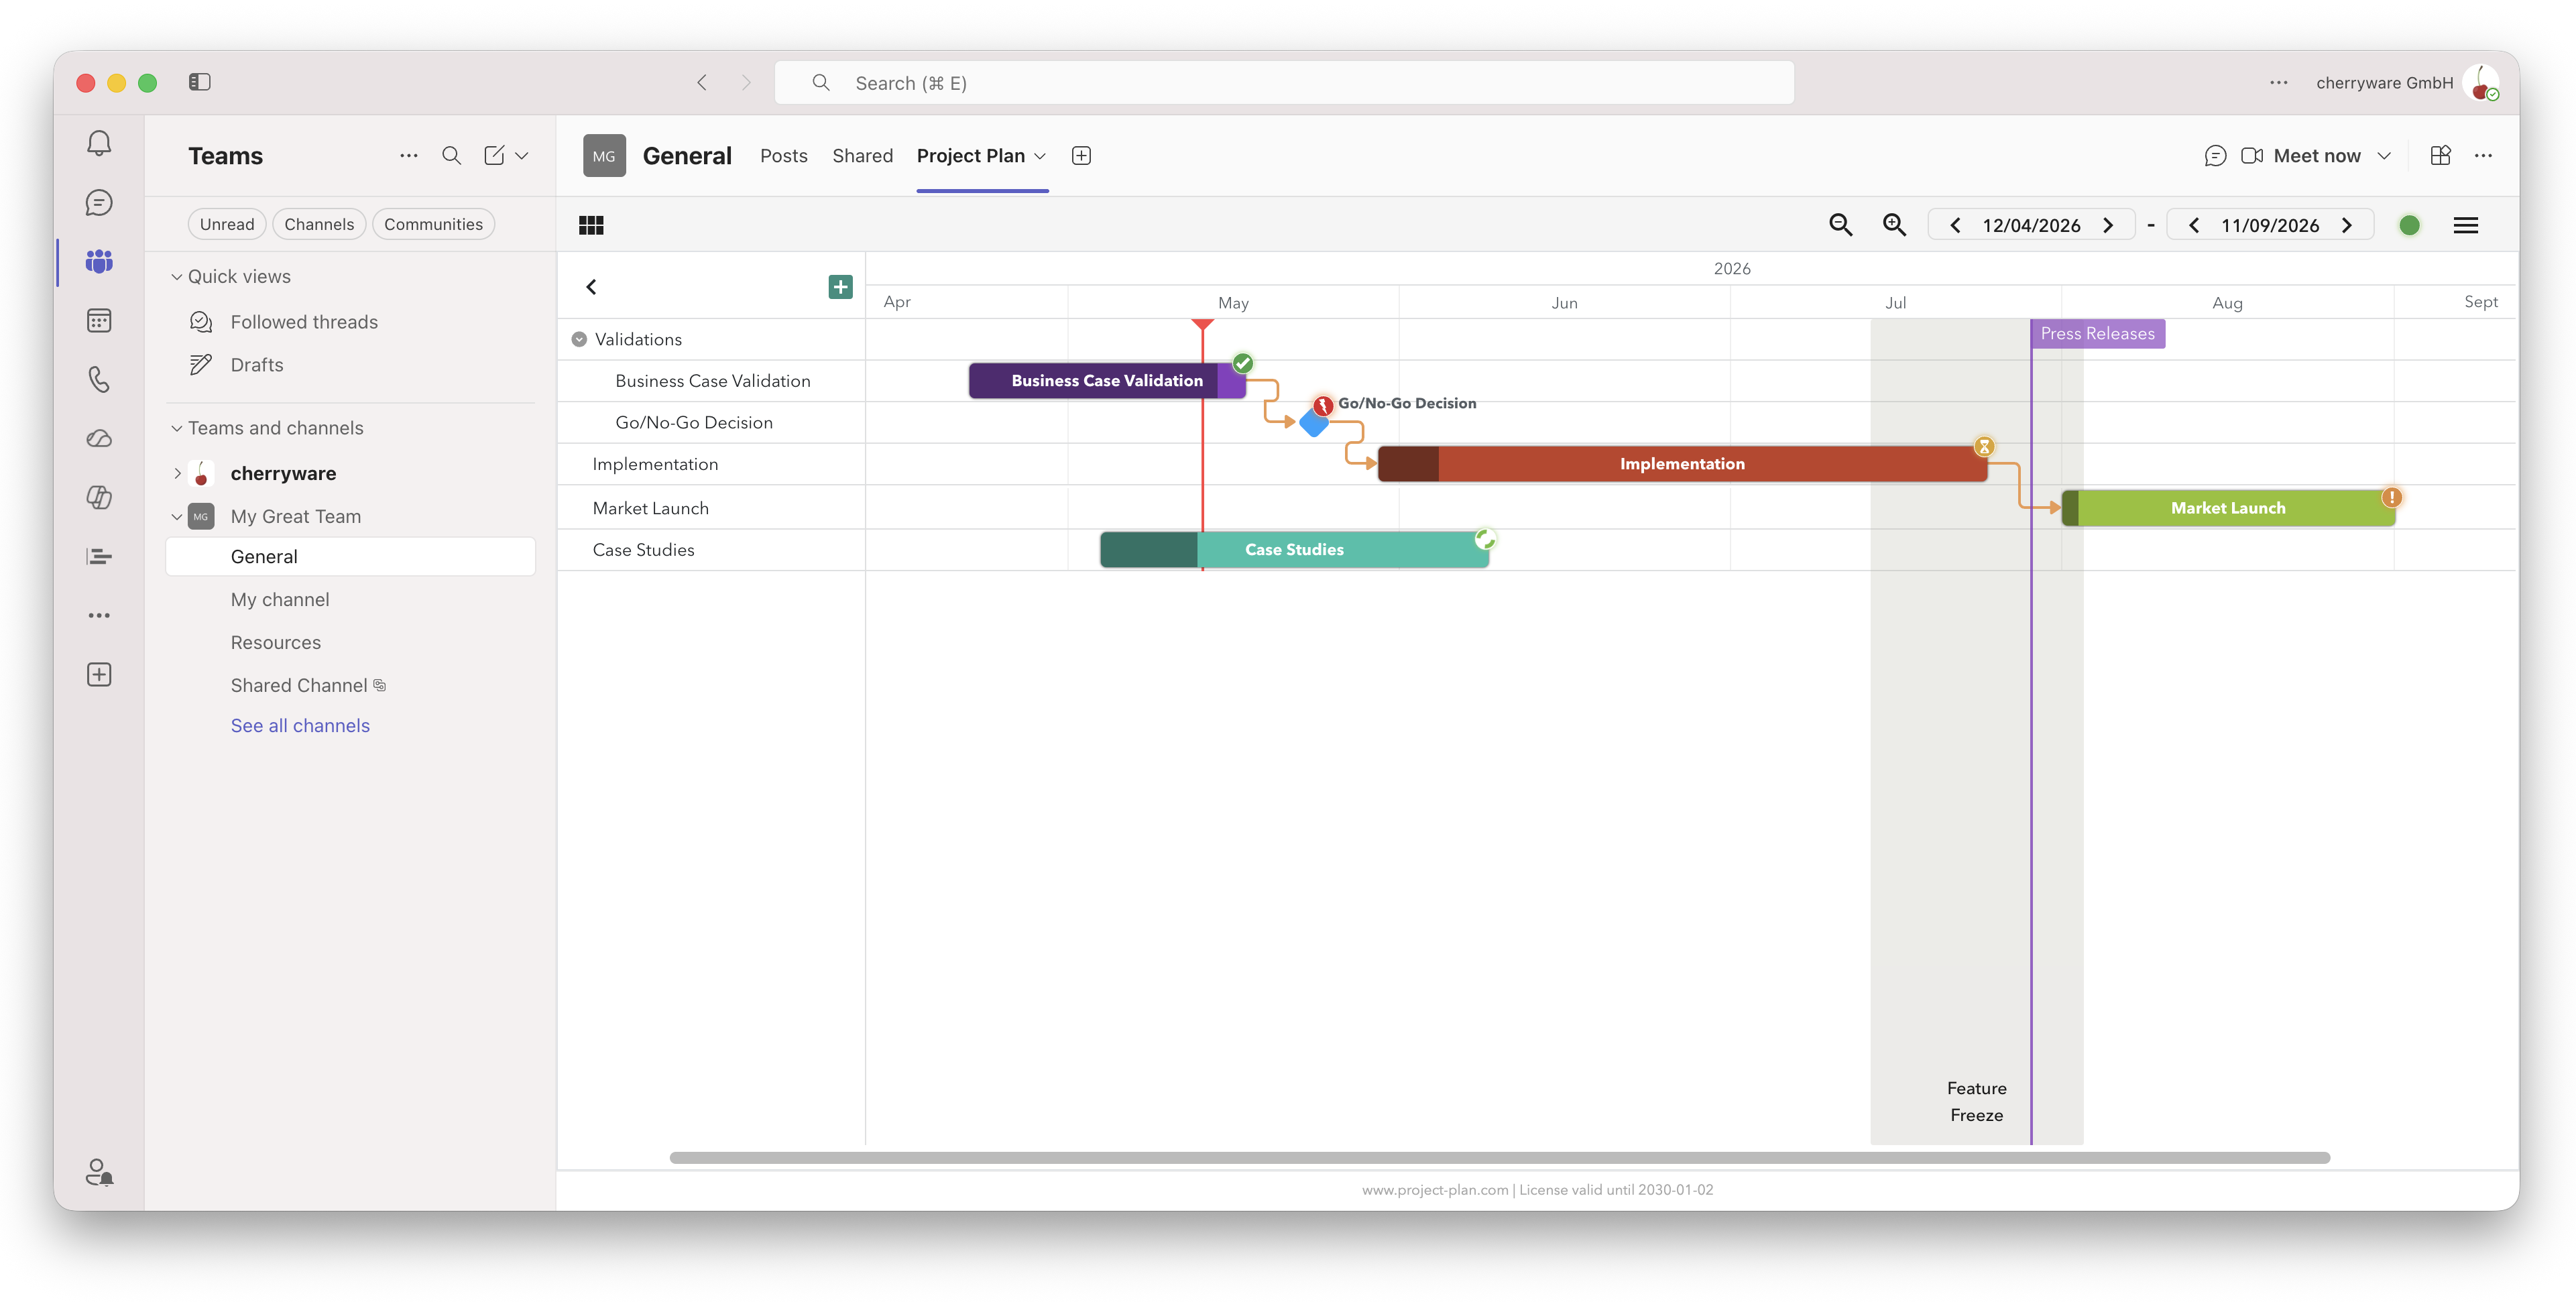
3) Add Tasks and Milestones
Next, tasks and milestones are added to the plan.
Setting Milestones
Milestones mark important events in your project. They can be added via the green plus button in the top left. Select the type Milestone in the dialog – it will appear as a diamond shape in the Gantt chart and is instantly recognizable at a glance.
Creating Projects, Sub-Projects and Tasks
Tasks can have any number of parent and child levels, allowing you to represent multiple projects → sub-projects → tasks → sub-tasks within a single plan. Items can also be added via the green plus button or by dragging directly in the plan with the mouse. Select the type Task in the dialog – it will appear as a bar in the Gantt chart. If needed, further sub-projects or sub-tasks can be created beneath an existing item. To do so, click the three-dot menu next to a task and select New child item.
Assigning Resources (Optional)
Resources can be assigned to tasks and milestones in the task dialog. In Microsoft Teams, resources can be selected directly from the corporate directory or entered as free text. These resources can then be used for filtering or for sending notifications within Microsoft Teams.
Defining Dependencies (Optional)
Link tasks and milestones to reflect dependencies. An arrow from A to B means: task B cannot start before task A is finished. If task A is moved or delayed, task B will be shifted accordingly when needed. This feature is optional. Dependencies can also be used purely for visual representation. In that case, tasks are moved manually using multi-select – hold Ctrl and click to select multiple items.
Tutorial
The following video shows all the steps for creating a project plan in Microsoft Teams in practice.
Video: Creating a project plan in Microsoft Teams
4) Collaborate With Your Team
Microsoft Teams provides an ideal environment for collaborating on a project plan. The plan is visible to all team members in the channel and stays in sync. If the plan is also mirrored to PowerPoint or Excel via the Mirror feature, it will remain up to date there as well.
A PDF export is always available whenever needed.
Tips & Best Practices
- Use different colors for tasks to visually separate project phases.
- Use parent-child items for better grouping – subtrees of the plan can then be collapsed and expanded. These items can also be added at any time after the initial setup. Drag & Drop is also available in the left-hand tree for regrouping.
- Avoid using too many dependency arrows – they are meant to aid clarity, and an excess of them can have the opposite effect.
- Use Copy & Paste to quickly duplicate recurring parts of the plan.
- When assigning resources, select them from the corporate directory so that the notification feature can also be used.
Wrap-up
With Project Plan by Cherryware you have a powerful yet easy-to-use tool that integrates project planning directly into your Microsoft Teams workflow.
Try it for free and see for yourself how straightforward project planning can be.